First of all, Thanks joshms83 and others,
Original Posts is in here
This guide references an image of setup files which I have made available here:
DELL M1210 OS X SETUP IMAGE: http://www.mediafire.com/?jmwxxyo1tht (MediaFire)
Note: The following is also provided as a nicely formatted read-me within the DELL M1210.dmg file attached to this post. The DELL M1210.dmg file also contains all of the patches/kexts/apps you need to follow the steps outlined below.
To help any desperate googlers:
Keywords: dell M1210 osx86 Geforce 7400 go External Monitor Dual Monitor Enable QE/QI Bluetooth Sigmatel 9221 Vanilla 9.0.6 10.5.6
rev. March, 2009.
The files included in this image were used to successfully configure a DELL M1210 Laptop using iDeneb v1.4 10.5.6 distribution and Vanilla 9.6.0 kernel. That is not to say however, that all or any of these files won't work for other configurations...
I've provided a summary of installation options used to get OSx86 running on a properly journaled partition, as well as a series of final install/patch steps to follow once you are successfully booted into OS X.
These files and instructions are simply a collection of other people's work organized and consolidated into a package that is (hopefully) easy to use and follow. I've attempted to provide credit to as many of those people as possible, but I may have missed some given this stuff was collected over several weeks of trial-and-error.
References:
http://www.insanelymac.com/forum/index.php?showtopic=41775 (M1210 Dual Boot Guide)
http://www.insanelymac.com/forum/index.php?showtopic=97966 (Dell Post Installer)
DELL M1210:
- Intel Centrino Duo T7200 @ 2Ghz
- 4GB DDR SDram @ 667Mhz
- NVidia Geforce 7400 Go (64Mb/192Mb)
- Sigmatel 9221 Audio
- Dell Bluetooth 355 2.0 +EDR (Broadcom)
- Dell 1390 (Broadcom) Wireless B/G
Resulting Working Feature Set:
This is a list of hardware/features that your system will support at the end of this process.
- Dual Cores (No need for cpus=1)
- GeForce 7400 QE/QI Enabled, Hardware Acceleration, Internal + External (Dual) Display
- Sigmatel 9221 Audio (Not Choppy)
- Internal Microphone
- Full Bluetooth Support
- Full USB Support
- Full Firewire Support
- Full Airport Wireless Support
- Full Laptop/Battery Support
- Full Intel Speedstep Support
- 5-in-1 Card Reader Support
- System will properly Sleep / Wake.
- Support for Apple Software Update
Issues:
- Intel 3945 A/B/G Wireless card is not supported (as of March 3rd 2009). You must replace it with a Dell 1390 card from Ebay (EASY - approx. $12)
- Shutdown command does not fully shutdown the system. I have identified this to be an issue with the Sigmatel 9221 audio patch and nothing else.
- Internal monitor does not properly recover when the system puts the display to sleep as a result of energy preferences (full system sleep works fine).
- Memory bank/DIMM_B is reporting a speed of 0 MHz. The system however, is reporting all 4GB of RAM.
- Logitech Quickcam (PID:0x08c6) is detected as a USB device by the system profiler, but is not yet supported.
Quickcam Drivers under development @ http://webcam-osx.sourceforge.net/cameras/index.php
Untested:
- ExpressCard Slot

OSx86 - iDeneb v1.4 10.5.6:
Vanilla 9.6.0 Kernel (Default)
Patches (Ready)
Chipset
- ICHx Fixed
Network / Ethernet
- AppleBC440x
Fix
- cpus=1 fix (Temporary)
- BatterManager
- Power_Off Fix
Video / NVidia
-NVKush (Temporary)
Apps
- ASU
- BetterZip
- OSx86 Tools
- Transmission
(OPTIONAL) NTFS Read/Write Support:
Note: While this step is listed as optional, if you are installing any of the provided patches directly from an NTFS partition, it is highly advised that you install full Read/Write support for NTFS drives before proceeding. It is also ideal for dual boot scenarios where you would like full control of your xp/vista partition from within OS X.
1. Install MacFUSE 2.0.3 (Mount and install from the .dmg file provided in the root of this setup image)
2. Install NTFS-3G (Mount and install from the .dmg file provided in the root of this setup image)
*Restart*
Patch Sigmatel Audio:
This step is required for OSX to fully support your Sigmatel 9221 audio and microphone.
1. Install AppleHDAPatcher (Copy AppleHDAPatcher v1.12 app provided in the root of his setup image into your Applications folder)
2. Apply Sigmatel9221 HDA Patch (Drag Sigmatel9221.txt provided in the root of this setup image onto the installed AppleHDAPatcher icon. (takes a while to run))
*Restart*
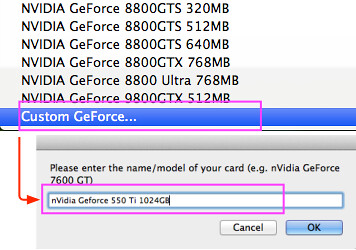
Install Modified NVinjectGO Extension:
The NVinjectGO v0.2.0 extension provided in this setup image has been modified to provide full QE/Hardware Acceleration/Dual Display support for the GeForce7400 Go. Graphics memory will read 512MB in system profiler, but this does not appear to have any adverse effects on system performance.
Note: "Mirror" mode will not work. Also, attempting to use the [Fn] + [F8] key combination (display mode toggle) will halt the system.
1. Delete NVKush.kext (Drag file to Trash - System/Library/Extensions/NVKush.kext )
2. Launch OSx86 Tools (Applications/iDeneb App/OSx86 Tools)
3. (OSx86 Tools) Install NVinjectGO.kext (Provided in this setup image (modified v0.2.0))
4. (OSx86 Tools) Enable Quartz GL
5. (OSx86 Tools) Run System Maintenance (Set Extensions Permissions, Clear Extensions Cache -> Run Tasks)
*Restart*
Enable Support for Both Cores:
This step will allow us to remove the "cpus=1" and "-f " kernel boot flags from apple.com.Boot.plist enabling and synchronizing both cores. Removing "cpus=1" enables both cores. Removing "-f" appears to correct kernel panic upon resume from sleep.
1. Launch OSx86 Tools (Applications/iDeneb App/OSx86 Tools)
2. (OSx86 Tools) Install Kernel ("mach_kernel" provided in this setup image under "/mach_kernel [DELL M1210] [Vanilla 9.6.0] [Dual Core]/mach_kernel")
3. (OSx86 Tools) Run System Maintenance (Repair Permissions, Set Extensions Permissions, Clear Extensions Cache -> Run Tasks)
*Restart*
4. Install pList Edit Pro (Mount and install from the .dmg file located on this setup image)
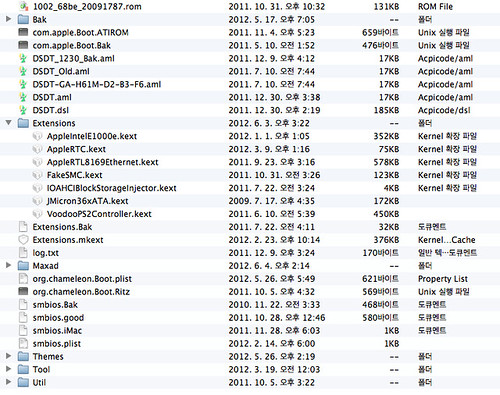
5. Open com.apple.Boot.plist (Library/Preferences/com.apple.Boot.plist)
6. Remove "cpus=1 -f" from kernel flags (Under <Kernel> change "<string>cpus=1 -f</string>" to "<string></string>")
*Restart*
If you system boots up normal, with no jittery mouse or sound, you are running properly with dual core support. While you shouldn't experience any problems, in the event that do, you can restart again, press any key during the darwin boot countdown and provide "cpus=1 -f" flags to boot back into stable system and undo the changes to your com.apple.Boot.plist file.
Install 5-in-1 Card Reader Support:
This kext installs support for the 5-in-1 card reader. I have used it to successfully mount a 4GB SD Card.
1. Launch OSx86 Tools (Applications/iDeneb App/OSx86Tools)
2. Install IOSDHCIBlockDevice.kext (Located in the 5-in-1 Card Reader directory included with this setup image)
3. Run System Maintenance (Set Extension Permissions, Clear Extensions Cache -> Run Tasks)
*Restart*
(OPTIONAL) Install Apple Software Update Support:
Notes originally provided with this mention needing chameleon 1.0.11 installed or higher prior to installing this feature. I did not try to update without this feature, but I did successfully patch my OS X installation using Apple Software Update after installing it.
1. Launch OSx86 Tools (Applications/iDeneb App/OSx86 Tools)
2. Install AppleDecrypt.kext (Located in the Apple Updater Support directory included with this setup image)
2. Install Disabler.kext (Located in the Apple Updater Support directory included with this setup image)
3. Run System Maintenance (Set Extension Permissions, Clear Extensions Cache -> Run Tasks)
*Restart*
(OPTIONAL) Install Intel Speedstep Extension:
I'm 50% sure that Speedstep is working without this step. Applying this step however, does not have any adverse effect on system performance, and allows you to visually confirm speedstep functionality via the included SpeedStep GUI application.
1. Launch OSx86 Tools (Applications/iDeneb App/OSx86 Tools)
2. Install IntelEnhancedSpeedStep.kext (Located in the SpeedStep Support directory included with this setup image)
3. Run System Maintenance (Set Extension Permissions, Clear Extensions Cache -> Run Tasks)
4. Install SpeedStep Application (Drag the SpeedStep included with this setup image into your Applications folder)
*Restart*
5. Launch SpeedStep Application (Run the installed SpeedStep app from your Applications folder to confirm working SpeedStep)
If you experience any problems (Kernel Panic, etc...) after installing IntelEnhancedSpeedStep.kext, press any key during the darwin boot countdown and provide the boot flag "-x". This will boot you into OS X "Safe Boot" and allow you to uninstall IntelEnhancedSpeedStep.kext from your system/library/extensions folder (by dragging it into the trash).
(OPTIONAL) Install Clamshell Display:
This step installs an extension that will put the system to sleep when you close the lid. It works 100%, but I'm not sure how I feel about it - so I marked it optional.
1. Launch OSx86 Tools (Applications/iDeneb App/OSx86Tools)
2. Install ClamshellDisplay.kext (Located in the Clamshell Display directory included with this setup image)
3. Run System Maintenance (Set Extension Permissions, Clear Extensions Cache -> Run Tasks)
*Restart*
If you decide you don't like this. You can remove it by dragging the ClamshellDisplay.kext file located in your System/Library/Extensions folder into the trash and restarting.
At this point you should have a pretty functional OS X setup.
Dual Boot Preferences/Notes:
- You can assign a more windows like behavior to your [CTRL] and [ALT] keys by swapping their key functions in System Preferences.
(Located under System Preferences -> Keyboard and Mouse -> Keyboard -> Modifier Keys)
- If you are using a bluetooth keyboard and mouse, they can be configured to work in both Vista and OS X without the need to constantly re-pair them:
1. "Connect" (not "Pair") to your device in vista (I use BlueSoleil v6 Bluetooth Stack).
2. In OS X, set up/connect your mouse using the "mouse" option (as you normally would) within bluetooth preferences.
3. In OS X, set up/connect to your keyboard using the "Any Device" option.
4. On the device locater screen, click "Passkey Options" and select "Do not use a passkey"
5. Proceed with the connection... select "use this as a remote control for my computer"
6. Future connection requests from your keyboard should be automatically accepted by OS X.
Note: I performed this with a Logitech MX5000 keyboard and Logitech MX1000 mouse (both bluetooth).
DELL M1210 OS X SETUP IMAGE: http://www.mediafire.com/?jmwxxyo1tht (MediaFire)