달력

1

« 2025/1 »

  • 1
  • 2
  • 3
  • 4
  • 5
  • 6
  • 7
  • 8
  • 9
  • 10
  • 11
  • 12
  • 13
  • 14
  • 15
  • 16
  • 17
  • 18
  • 19
  • 20
  • 21
  • 22
  • 23
  • 24
  • 25
  • 26
  • 27
  • 28
  • 29
  • 30
  • 31

Boot think는 Boot camp와 아주 유사한 부트로더군요..

한번 사용하여 보세요.


On the boot think


1, like Apple's Boot camp interface


2, a custom icon


1, suitable for the target
Apple installed in the PC system , And and operating system to Windows XP, Vista, Windows7or Linux, such as coexistence, at the same time want to experience the perfect start to guide the process of Mac and enjoy the flavor of the original Apple.

2, Boot-Think what
Boot think is installed on your computer in general the original Mac OS's a multi-system guidance tools on the computer and to facilitate the coexistence of multiple system start-up options.

3, Why should we use the Boot-think
Boot think is designed to let the PC is more convenient to start the original Mac OS system, so also in the design style as much as possible of the original Mac to inherit the graphical interface to start the effect. Boot think, after all, is designed as an ordinary PC, it also enhances the performance of the Windows system boot support.

4, a description of the problem
a, Boot think only provide the original Mac OS on the guidance, but specific to a computer can install the original Mac OS systems, can refer tohttp://wiki.osx86project.org/wiki/index.php/HCL_10. 5.6


b, Boot think although it is to guide the design of the original system, but the same version ofMac OS support systems break guide


c, Boot think 1.1.0 is currently only supports HFS + format in the primary partition to install


5, Boot-Think Functional Description

Function


Remarks


Support GUID and MBR partition

Support the hidden EFI partition installation
Can be installed in the EFI partition GUIDformat
To support the hard disk, U disk to install
Recommended in the U disk
Supporting documents to guide
The need to manually create the WindowsStart menu under
Hard disk operating systems and more and more guide
To support the XP, Vista, Win7, Ubuntu and other operating systems
GUI interface

Mac OS X installed on the original CD-ROM

Shortcut keys to start

Startup configuration

To simplify the zonal list

Default boot partition


6, operating instructions

Shortcut keys to start


Description


c
Original CD-ROM to start the installation of Leopard
Alt (Option)
Start into the Startup Manager, you can choose to boot from a partition
Shift
To start in Safe Mode and log in the temporary closure of
Ctrl (Command) + v
Verbose startup mode for
Ctrl (Command) + s
Start for the single-user mode


Set command


Description


#-B
Select the current partition settings as the default boot partition
# P =-
Show only bootable partition
# P = +
Shows that the restoration of Zoning
# G = WxHxDEPTH
For example, g = 1024x768x32 set default startup resolution
~
Cancel all settings

Boot_Camp graphical interface to guide, Leopard original PC CD-ROM to install the video: http://www.tudou.com/programs/view/9wyX20MjGPc/

XP, vista, Win7 support for video: http://www.tudou.com/programs/view/V-_PUcMzu2c/

Default boot partition set up, the Chinese label support video boot Shortcuts:http://www.tudou.com/programs/view/PFdQGJjyQyY/

Show only bootable partition in the menu Video:http://www.tudou.com/programs/view/eShFSYP3V6k/


7, Boot think the installation of

Download the latest version of boot think the installation package, extract the Apple system running after the double-click the installation process need to select the installation location, the default system partition for the Mac OS (Note: Boot think 1.1.0currently only supports HFS + in the primary partition to install).


Select the installation path can click on the bottom left corner after the custom button for custom configuration

Offers three installation modes:


1)
Only option Boot1h election. After installation boot think does not boot directly from theboot think to start, but as usual into the Windows system, and then guided through the browser from the Windows boot / Darwin/standalone/i386 / copy files from the fileboot toachieve the re-boot think guidance, in order to get graphics interface, select the system tostart.


Such installation, the installation package file boot1h only choice to write the partition to install inside a sector that is the command: dd if = boot1h of = / dev / rdiskXsY), in order to be discovered and boot0 or run fileboot


2)
At the same time check the two options Boot1h and boot0 (This is the default installation mode). After installation boot think boot directly from the boot think started to enter the graphical interface, select your system, such installation, the installation package in addition to the completion of a mode of operation, but also to document boot0 write MBR sector of the disk (that is, the command : fdisk-f boot0-u-y / dev / rdiskX).


3)
EFI only option election, the abolition of the two options Boot1h and boot0. Boot think will be installed on the hidden EFI partition GUID partition, select the installation mode to install partitions, select the GUID partition can be arbitrary, the installation program to find hidden with EFI disk partition, and installed to the EFI partition.


The proposed primary use default settings.


8, Boot think the use of
When the boot think the interface is activated, can be used around or up and down arrow keys to achieve the system to start the selection, for the Mac OS system, if the need to enter an order parameter, can be F8 key to enter text mode. Specific operations, see 6

9, Boot think that the issue should be
boot think installation package must contain only the boot drive, if the need to crack the driver, please install itself.

(Qq base 18458890)

download for boot think:
(The same as the three download links, choose a download link on the line)


http://www.mediafire.com/download.php?zymkwgiawmt

http://uploaded.to/file/p2itba

http://www.megaupload.com/?d=NZSZA9II


'Hackintosh > Boot Think' 카테고리의 다른 글

Boot Think 설치하기  (0) 2009.10.27
:
Posted by Ritz®™
2009. 5. 31. 17:47

자동로긴 설정 Hackintosh/Tip2009. 5. 31. 17:47

:
Posted by Ritz®™
2009. 5. 31. 17:38

com.apple.Boot.plist화일 편집하기 Hackintosh/Tip2009. 5. 31. 17:38

:
Posted by Ritz®™

New universal Injector for ati and nvidia, and multiple ati cards enabler.

source form Netkas : http://netkas.org/?p=104#comment-25268

This new kext, is natit 와 aty_init integrated 하나로 통합된 드라이버로서 주로 nvidia 그래픽 카드를 지원하며 특히, video 램크기를 읽어오는 부분을 좀 더 강화시켰습니다.

가능한 nvidia geforce8 시리즈 이상급에서 사용하시기를 권고합니다. 또한, ati cards의 램을 읽어오는 것을 지원합니다만, multiple cards를 위한 바이너리 추가는 진행하지 않았습니다.

MacPro ATI/Nvidia pc 카드 사용자들도 지원합니다. (예를들면, radeon 4890).

카드 상태는 아직 베타이지만, 동작은 잘 되지만 테스트가 필요합니다.

ati 이름으로는 부족하군요. 좀더 좋은 이름이 필요할 것 같은데 혹시 제안하실 거라도?


^ ^
nVidiaNATI Driver

'Hackintosh > Graphic Card' 카테고리의 다른 글

NVIDIA Quadro FX4500  (0) 2009.06.20
GTX시리즈 드라이버가 나왔군요.  (0) 2009.05.29
Callisto driver  (0) 2009.05.17
NVIDIA GEFORCE 9500 GT, IDENEB 10.5.5  (0) 2009.05.11
:
Posted by Ritz®™
2009. 5. 25. 09:33

Mac Os X on P5E + 8800GT and Q6600 Hackintosh/Mainboard2009. 5. 25. 09:33

First of all, thanks drmando for this Guide.

Mac Os X on P5E + 8800GT and Q6600

ALL YOU NEED IS IN THIS FILE: http://rapidshare.com/files/86007773/drmando.rar
The Bios-Setting
1. AHCI Enabled
If windows vista is already installed you will first have to boot into vista and go to your windows directory and open de regedit.exe. Then go to HKEY_LOCAL_MACHINE\Sysyem\CurrentControlSet\Services\Msahci and change the Start property to "0"
2. Execute disable function = enabled
3. ACPI2 support = Yes
4. Intel speed step = disabled
Now you are ready to install.

The Installation
I used the KALYWAY image to base my installation on
My system:
SATA HD Spinpoint Samsung 500GB
-)2partitions a OSX of 200
Data of the rest
SATA DVD-RW Lite-on 20x
ASUS P5E with an X38Chipset … see asus.com for entire hardware list.
2GB RAM GEIL
NVIDIA 8800GT OC MSI

After having done the bios settings I put in the cd of MAC OS X. I pressed F8 for installation options and put in a "–v" to have terminal view instead of white apple screen in witch you cannot see errors. Loading the GUI of the installation may take a while.

The GUI has loaded, and asks for your languague, choose one and continue. Now go to utilities -) Disk utility and format partition your HD to your will. Be sure to have a Journaled partition as OSX requires one to install onto the rest of the partitions you may choose like HFS or whatever other format you like.

Install the vanilla kernel with patch leave other options for what they are may only cause crash.

Complete the setup and reboot and remove the CD.

WARNING if after reboot you have error 0b NO WORRIES, its just that your partition is not active (YET) in that case just leave the DVD in it and let it time out and you will boot into leopard.

OSX now loads continue till registration then hit windows sign and Q to skip it.

OSX after installation
This is were the tricky part starts. First you have to fill in some info until you come at the registration form. Just press CTRL+Q (some keyboards WIN+Q or ALT+Q) to skip the registration. Mac Os X setup is now complete but graphics are standard, no sound an no networking device!

Solutions follow!
The network adaptor (IF IT'S NOT WORKING YET)
I started with the network adaptor. For my motherboard I need to find the kext or make the kext for a Marvell Yukon 8056 type. There is none … no problem I fix it!

You will need to download following file from rapidshare or from my zip file. gigabyte_ds3-4pack.1.2.dmg wich has the 8053 version of my chip included. I will use that one to make mine. Install the package and then reboot.

Go to the terminal and type following commands:
CODE
cd /System/Library/Extensions <-- changes directory
sudo nano IONetworkingFamily.kext/Contents/PlugIns/AppleYukon.kext/Contents/Info.plist <-- edits file

(find and change: <key>Yukon-88E8053</key>)
(to: <key>Yukon-88E8056</key>) <-- change "53" to "56"

(find and change: <string>Yukon Gigabit Adapter 88E8053</string>)
(to: <string>Yukon Gigabit Adapter 88E8056</string>) <-- change "53" to "56"

(find and change: <string>0x436211AB</string>)
(to: <string>0x436411AB</string>) <-- change "62" to "64"

(press Control-O) <-- saves changes
(press Y and Enter) <-- accepts saving to existing file
(press Control-X) <-- exits nano

sudo chown -R root:wheel IONetworkingFamily.kext <-- repairs permissions
cd /System/Library <-- changes directories
sudo rm -rf Extensions.mkext Extensions.kextcache <-- rebuilds kextcache on reboot
I have had a lot of problems finding the right commandline for the file. If the file is empty its not the right one!!! Google a bit and look around for different variations. These lines worked for me. IONetworkingFamily.kext/Contents/PlugIns/AppleYukon.kext/Contents/Info.plist

Once Opened you will have to change the file like stated above using the CTRL+… key for controlling the edit program with controls stated downside in the box.

Reboot and network will work.

The VGA
I have a 8800 GT OC 512 version of MSI. I looked around on the net and found out this was the easiest of all biggrin.gif

Just install the 10.5.2_NVkexts+.pkg included in my zip

The Audio
!UPDATE! ONLY THE BLUE EXIT LINE 2.1 SOUND !!!!

Take the AzaliaAudio.pkg from my zip and install it. Then run following command lines.

Step 1: (backup if you want too) Delete AppleHDA.kext:

sudo rm -rf /System/Library/Extensions/AppleHDA.kext

Step 2: Edit AppleAzaliaAudio.kext for matching codec's proper ID:

sudo nano /System/Library/Extensions/AppleAzaliaAudio.kext/Contents/Info.plist

goto Realtek ALC880/ALC860 Codec Driver key & change the <string> to

<string>0x11d4198b</string>

ctrl + O to save ctrl + X to quit

Step 3: Edit AppleAzaliaController.kext for matching ICH9R HDA interface proper ID:

sudo nano /System/Library/Extensions/AppleAzaliaAudio.kext/Contents/PlugIns/AppleAzaliaController.kext/Contents/Info.plist

find <key>IOPCIPrimaryMatch</key>

change the <string> to

<string>0x293e8086</string>

Step 4: Refresh kext caches

sudo rm /System/Library/Extensions.kextcache

kextcache -k /System/Library/Extensions/

Step 5: Disk Utility>Repair Disk Permissions

Step 6: Reboot

WARNING: in step 4 it might not succeed I just went to that directory and cleared the cache map myself restored my disk and rebooted and it worked fine.

YOU HAVE SUCCEDED!!
Congratulations!! You have successfully done what I have.

Hope this info was handy based mine on lots of posts trough the net, many thanks to those people.
!UPDATE!
I can see from my RS account that my file gets downloaded many times, plz leave some feedback so i can work on fixes. thank you!!
!UPDATE!
:
Posted by Ritz®™

하나의 하드디스크에 윈도우즈와 MAC OSX를 설치하려면 어쩔수 없이 MBR 파티션을 이용할 수 밖에 없지만 권장할만한 사항은 아닙니다.

왜냐하면 차후에 GPT+ GUID 방식이 아니라 MBR 파티션 방식이면 이것저것 걸리는 사항이 많더군요.  이를테면 디스크 이미지를 이용한 설치는 Osinstall.Mpkg 등을 수정하여야 MBR 파티션에 설치해야하는등 아픔이 많습니다.


하지만, 많은 사용자들이 하나의 디스크에 파티션을 나누어 윈도우즈와 MAC OSX를 설치하여 멀티부팅을 하는게 현실입니다.

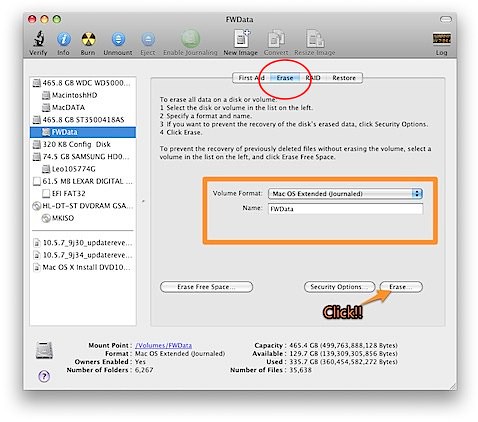
이러한 경우 윈도우즈에서 FAT32로 파티션 한 다음, 다음그림과 같이 파티션을 변환하여 주면 됩니다.


설치 DVD등으로 설치 과정에 진입하면 설치할 파티션이 제대로 설정이 안 될 경우가 있다.

이런 경우 다시 한번 MAC Journaling으로 파티션으로 변환하는 방법중의 하나가 그림과 같은 방법이 될 것이다.

설치 과정중에 상단 메뉴의 utility에서 disk utility를 선택하여 다음과 같은 그림으로 진행하면 된다.


Picture_2

:
Posted by Ritz®™

Update : https://cafe.naver.com/uefi/15762

10.5.7 로 부팅하고 난 후 정상부팅시도를 하면 커널패닉으로 부팅이 안되는 경우가 있습니다.

이런 경우 다음과 같은 방법을 사용하시면 적어도 어떤 드라이버에서 문제가 발생하는 지 알 수 있습니다.
 
다음 방법은 리테일 DVD 이미지를 사용하였을 경우에만 사용하십시요.  
AMD 시스템에서는 그때그때 상황에 따라 다르므로 참고만 하여 주십시요.
Chameleon/XPC 방식의 부트로드일때만 권합니다. 
 
1. 부팅옵션을 "-v -f -s" 를 주어서 싱글유저모드로 부팅한다.
2. "exit"입력하고 엔터를 치면 다시 정상모드로 부팅이 되는 데 이때 화면에 뜨는 로그들을 잘 분석한다.  <<  이때 특히 Legacy 관련 Kext 로딩시 로그화일들을 유념해서 보아야 하고 부팅이 안되면 Legacy 관련 Kext를 제거하고 부팅시도합니다.
또한, AppleHDA.kext 도 커널패닉에 일조를 하는 경우의 수가 있으니 이 파일도 원본 화일로 돌려 놓고 부팅시도를 합니다.


1. 시스템 상황 파악하기 

http://tinyurl.com/oupzeh 


2. 추가 조치 방안 

http://tinyurl.com/cqxw3m 


3. 이미지의 종류 

http://tinyurl.com/oy2drt 


4. 드라이버만 골라 설치하기 

http://tinyurl.com/qlhngh


5. 관련시스템 설치이력 찾기

http://tinyurl.com/oogevb


:
Posted by Ritz®™
2009. 5. 18. 17:20

UEFI(XPC) 설치방법 Hackintosh/XPC2009. 5. 18. 17:20

2014-02-05 Update : http://cafe.naver.com/uefi/6

05-18 추가>> 준비사항

0.45 x64 bugfix 2 out for testing: http://ul.to/irgvyz | Success and Bug report: xpc.boot@gmail.com | Tester Tool Kit http://tinyurl.com/cjgbe2 | _dont_ use gptsync on stick!! | refit-tools: http://is.gd/qRmc | grub.efi http://is.gd/r109 | your splashscreen will goto \xpc\xpc_splash.bmp


* Axxen, HP I-Clip, Sky 등등 좋은 제품이 많다.
쓰임새와 용도는 동일하지만,USB 메모리 스틱은 외장형 하드디스크와는 다르다.  

사전숙지사항.

초보자와 해킨이미지를 이용하여 설치하였던 사용자들에게는 권하지 않는다.
"10개월 걸려서 성공하였다." 라고 하는 의지의 한국인(?)분들은 자제하기 바란다.  ^  ^
스트레스에 강하고 취미삼아 설치한다면 좋다.  
시스템을 설치 반복하기 위한 시스템이 아니라 깔끔하게 사용하길 원하고 국민보드를 보유한 사용자에게 권한다.

- ASUS P5W DH DELUXE, P35 칩셋, GA-EP45-UD3R(P45), GA-H61M, H67M, Z68 칩셋 보드를 가진 사용자들에게 우선 권한다.

1. 일단, 한 하드디스크에 한 파티션(GUID)만 있어야 하지만, 두개의 파티션을 이용해도 좋다.  

두번째파티션은 MacData 파티션, 유지보수 파티션등이나 혹은 설치용 이미지를 넣어서 설치용으로 이용할 수 있다.

MBR 파티션은 테스트해보질 않았다.
 
    Priority(우선권)이 높은 하드디스크 파티션을 자동적으로 찾아 부팅이 된다.
    그리고 가능한 기존 하드디스크는 빼고 하드디스크 하나만 연결하여 설치하는 것이 좋다.
   JMicron칩에 연결된 HDD로 부팅하면 실패할 수 있다.

   * CMOS SETUP에서 AHCI를 IDE로 세팅해주어야 한다. (ASUS P5W DH DELUXE)는 양쪽 다 부팅이 되었지만,,,,)
   * Retail DVD를 TransMac, UseBit 등의 Tool로 USB에 이미지복사하여 준비되었다면 Retail DVD로 자동 부팅된다.

05-18 추가>> DVD 설치와 부팅모두 P45 메인보드에서는 AHCI로 세팅해야 10.5.6 Retail 설치DVD를 인식하고 설치과정으로 들어간다.

2. 파티션맵은 일단 GUID를 해야 적당하다.
     MBR방식은 아직 테스트를 하지 못했다.

3. Efildr20은 만들어진 USB의 최상단 폴더에 위치해야 한다.

4. extra_kext 폴더를 만들어서 관련 기존 드라이버들을 옮겨 두는게 좋다.  (Boot-132방식과 유사하지만, 조금더 맥클론에 충실하다.  현재 지금까지 나온 부트로드 중 가장 맥에 가까운(?uefi기반으로 개발되었기 때문에) 부트로더이다.
개인적으로는 이 부트로더 방식도 오픈소스 프로젝트로 진행이 되었으면 하는 바램이 있지만 개발자의 의도는 다른 듯 하다.
exta_kext폴더에 들어갈 kext내의 Info.plist의 내용에 "Safe" 대신 "Local-Root" 로 되어 있는지 확인해야 한다.

5. 기타 몇가지 제약 사항이 있는데 아직 검증단계에 있다. Natit.kext 같은 경우 extra_kext 폴더에서 로딩이 안된다는 벨기에쪽의 리포터가 있었는데 저는 양쪽다 잘 된다.  (/S/L/E 나 Extra_kext)

그리고 1349와 관련된 소소한 버그가 조금 있다는 이탈리아쪽에서 리포터가 있었다.

마지막으로 하드디스크로 부팅하는 새로운 부트로더가 몇일전 개발자 및 테스트들에게 배포되었다.
하드디스크로 부팅할려면 xpc0.38a를 사용하는 것이 좋다.

05-18 추가>> 0.45 b2 버전이 나왔다.


설치 방법.


가. 일단 위의 준비물중 XPC_TESTER_KIT.zip 을 다운로드 받아서 압축을 푼다.
나.  USB 드라이버를 FAT32로 포맷한다.
다. bootsector.rar 의 압축을 풀어 윈도우즈 커맨드 상에서 다음과 같은 명령어를 입력하여 USB 드라이버를 부팅가능하게 하여 준다.
C:\>makeusb drive_letter (예. makeusb g:       <<<  USB가 G 드라이버일 경우)


사용방법
가. CD-ROM에는 Retail이나 해킨 DVD를 넣는다.
나. 만들어진 XPC부트로더를 이용하여 부팅한다.
다. 설치 DVD를 선택하여 설치과정으로 진입한다.


'Hackintosh > XPC' 카테고리의 다른 글

efi driver  (0) 2009.10.25
XPC Gui v0.50a  (0) 2009.10.21
XPC Menu  (0) 2009.06.15
XPC 설치  (0) 2009.05.18
0.45 x64 bugfix 2  (0) 2009.05.06
:
Posted by Ritz®™